Tuesday, December 27, 2011

Pineapple Brown Sugar Christmas Ham

This is my recipe for the best Christmas ham ever! This year we weren't going anywhere so I only needed a 5 pound ham. It cost $17 at Walmart. I already had everything else at the house except the pineapple which was about $1.38 for the 20 oz can also at Walmart. You will also need whole cloves, 1 cup of brown sugar, 3 heaping tablespoons of cinnamon, and a few squirts of pure clover honey. (and tin foil and a pan of course :)

^Ham :)

^Mix up your brown sugar and cinnamon together and rub it all over the entire ham, heaping extra up on top after you've done the bottom, and pressing it into the ham lightly.

^Time for the cloves and pineapple!

^Put a small rack in a casserole dish (or whatever you're going to cook your ham in) so it sits up out of the juice just a little bit. You want the steam to circulate around the entire ham when it's covered and in the oven.

^This is why you piled extra of your brown sugar mixture on top. With one of these meat spearing thingy's (not sure what it's actually called...) poke holes in your ham all over the top about every inch or so. This pushes some of the brown sugar down in and allows the flavors and steam to get down inside the ham.

^After you're done poking your ham, take a large knife and score the top in a criss cross pattern. Put a whole clove in each section. You don't have to score very deep.

^Heap your pineapple on top, and pour the juices and the rest of the pineapple around the bottom of the pan. sprinkle the rest of your brown sugar mixture around the entire pan and on top of the pineapple topped ham. Squirt some honey around in the bottom of the pan. Cover your pan with tin foil. Your ham is now ready to cook. For this 5 pound ham I cooked it at 350 for 1 hour and 15 minutes. The directions said an hour and a half, but that was just too long and it was done before that.

^When your ham comes out of the oven, take a meat baster and use the juices from the bottom of the pan as a glaze, and put it all over the ham. Serve immediately. Enjoy :)

Monday, December 5, 2011

Chicken Enchilada Casserole (dairy- free & low carb options included)

Per the request of my mother-in-law, here is my Chicken Enchilada Casserole! Dairy free with a low carb option. Can't get any better than that. And it's easy, yummy, and quick too! NOW, you can't get any better than that! So whip this up for dinner and enjoy. Happy Cooking :)

Tortillas: (I prefer low carb whole wheat tortillas, but for my family I use Tortilla land brand that you buy the dough and cook it yourself. They are SSOOO much yummier than the regular pre-made ones you buy in the package.) Cook them.

1-2 cans of canned chicken, depending on your casserole/family size. I prefer chicken, but you could cook up some ground beef, or use shredded pork as well. Make sure it finely shredded, cooks better that way. Toss it with a bit of extra virgin olive oil and salt and pepper to taste, not too much though.

I think I used about 12 whole tortillas for this recipe and it fed my husband for days. (My kids won't eat the veggies and I made a smaller low carb one for myself) Rip them up in random pieces and lay them out in a layer on the bottom of your casserole dish. There's no need to spray or butter your dish.

For this particular casserole I used green chile enchilada sauce, I prefer the regular kind for myself though, mild. Spread a good layer on top of the tortillas. I used almost an entire can for one casserole. Spread it around evenly over the tortillas strips.

The next layers are the chicken and the cheese. Nice and thick with the cheese if you can. I only had one package of vegan cheese so my cheese layer isn't as thick as I would have liked it to be. In my opinion, the more cheese, the better!!

Sprinkle on some diced ripe roma tomatoes and chopped purple onion. This layer is optional, but my hubby LOVES both veggies, so I just had to add it.

Repeat those layers (tortilla strips, sauce, chicken, cheese, veggies) as many times as you would like, or till your casserole dish is almost full. Top the casserole with chopped veggies and cheese. Cover and cook about 20 minutes, then uncover and cook another 15 minutes to make the cheese a little crispy. Vwa la! In about 40 minutes you have a yummy dinner for your family. Enjoy :)


Saturday, December 3, 2011

Non-Dairy Chocolate Banana Cream Trifle

I made this dessert for the first time on Thanksgiving and I was really excited about it. I was a little nervous about how the non-dairy substitutions would make it taste, but it did not disappoint! So here's my non-dairy version of a yummy Chocolate Banana Cream Trifle.

*Side note* If you are making this dessert for a gathering and are worried about someone being allergic to bananas (like my brother is) then leave them out and it still makes a yummy dessert. I was also thinking about slicing strawberries and trying a Chocolate Strawberry Cream Trifle. Yum, huh? For a gluten free alternative try crushed brown sugar almonds in place of the graham crackers. That might be tasty :)

For this trifle you will need:
18 whole Honey Graham Crackers, crushed
1 cup vanilla Soy Milk
1 - 3.4 oz box Jell-O Brand French Vanilla Instant Pudding Mix
1 & 1/4 cup Ghirardelli Semi-sweet chocolate chips
2 containers SoyaToo Extra Heavy Whipped Cream
4 Lg Bananas, peeled and sliced
2 Tbsp 100% Lemon Juice

^1st, break up your graham crackers and crush them as best you can. Set aside.
^Next make your cream. Mix the Jell-O mix, the soy milk, and all but 1 cup of your whipped topping in a bowl and whisk together till smooth.
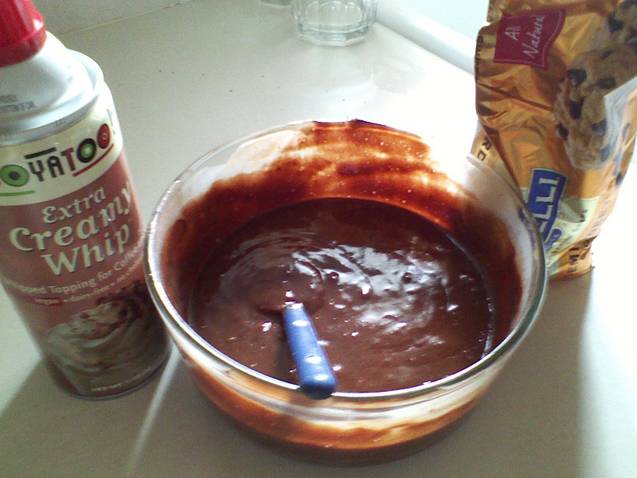
^For your ganache, microwave your chocolate chips in a glass bowl till smooth and add in that last cup of whipped cream.
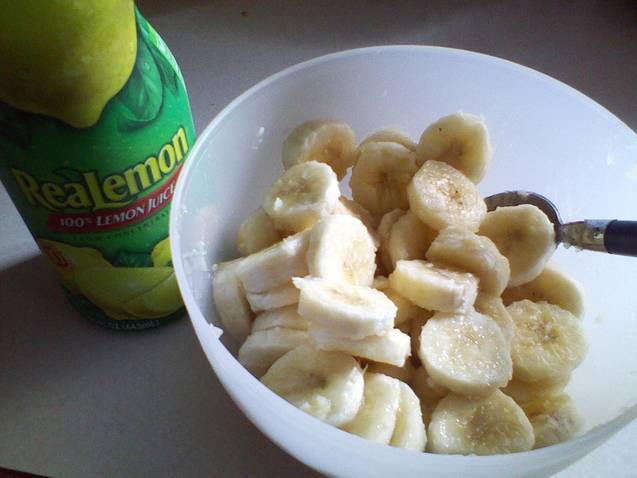
^Peel and slice your bananas. It's best to use bananas that are ripe for eating, but not to ripe so they are not as soft as a fully ripe banana. Place the slices in a bowl and toss with the lemon juice. THis keeps your bananas from browning. Set aside 12 slices for garnish.
^Next you start with your layers. Place half the graham crackers on the bottoms of the dish you will be serving from. I used a Trifle Dish, purchased for $6.97 at Walmart. Arrange a single layer of bananas on top of the crackers. I only had 3 bananas so my layer is thin, plus my hubby is not a big banana fan. You don't have to go so thin if you had all 4 bananas.
^Next, spread 1/3 of the chocolate ganache over the bananas and over the ganache spread half of the pudding filling. Repeat Layers. On top, decorate with the remaining ganache in a criss cross pattern, and sprinkle with the remaining graham cracker crumbs. Arrange the bananas you set aside in a circle for the garnish.
^Cover and chill for 2 hrs so your fillings can thicken and set. Serve cold and keep refrigerated.
Enjoy!

Monday, November 21, 2011

Dairy/Gluten Free Peanut Butter Chocolate Bars

I don't know about y'all, but I can already feel my Thanksgiving excitement building. It just so happens to be my very favorite holiday.

One, it usually never snows on Thanksgiving... usually, and I really don't like the snow. Two, four letters, FOOD. Turkey, stuffing, fresh mashed potatoes with turkey gravy, mac&cheese, hot buttered rolls, pie, the smell of fresh chopped green veggies... need I go on? Three, every other holiday seems to bring drama with it, except this one. And those are the reasons that I love Thanksgiving.

In anticipation of this wonderful holiday I already have my brain set on the best part, the desserts. Oh yes, I went there!

So here's a little holiday treat that is gluten and dairy free. Cooked in a 13x9 inch dark glass casserole dish and cut into 12 bars, this delicious dessert has 22g of carbohydrates and 6g of protein per piece. Did I mention you only need 1 bowl, 1 cooking dish, 1 stirring utensil, your hands, and 6 ingredients? Let's get started.
The 6 ingredients you need are:
- 3/4 cup All natural Creamy peanut butter
- 2 Lg eggs
- 1/2 cup Packed brown sugar
- 1/2 cup Stevia in the Raw
- 2 cups gluten free all purpose baking flour/mix
- 1.5 cups Ghirardelli semi-sweet chocolate chips, they're dairy free
Preheat your oven to 325. Grease the bottom and sides of a 13x9 inch baking pan.

In your large mixing bowl, mix together all the peanut butter and both eggs until it's smooth.

Add in your brown sugar and stevia and stir till all mixed in.

From this point on it will be easier to mix with your hands.

Add in the baking flour/powder and mix till completely moistened.

Once done, fold in chocolate chips.
Pour the entire mix into your greased baking pan and spread out evenly. Push down gently with your fingers till the top looks more like a cookie cake than a pile of sugary peanut butter and chocolate chips.

Let it bake uncovered for 30-40 minutes, or until golden brown.
Cool 25 minutes and cut into twelve equal pieces.
Using less sugar and a different type of baking mix did make them a bit crumbly, but they were still pretty dang yummy!
Enjoy :)
*I have posted the original recipe here at the bottom for those of you who have no food allergies and don't care to lessen your sugar content. I hear they are divine this way!

3/4 cup peanut butter, crunchy or creamy
2 large eggs
1 cup packed brown sugar
2 cups all purpose baking mix, such as Bisquick
2 cups regular M&Ms
Mix and bake the same way, adjust baking time as needed.

Saturday, November 12, 2011

Yummy Low Carb Treat

I was really craving something sweet and chocolatey and yummy that wouldn't put a damper on my diet the other day and so I decided to make some chocolate covered cashews.

This is the chocolate I used, semi-sweet and dairy and gluten free. Melt your chocolate squares or chips in a bowl completely. Add your cashews and toss well.

After all your cashews (as many as you want, but not more than you have chocolate for) are tossed and coated well, lay them out on a sheet of wax paper. Make sure your layer is thin so the nuts aren't all bunched together. I didn't have wax paper so I used tin foil which worked just fine. Let them dry for 5 minutes then take a single sprinkle of sugar and sprinkle it over the partially dried cashews. (Not enough to add any negative nutritional value, but enough to add just a tiny bit of sweet.)

Mine took forever to completely dry, but I just pulled them off and put them in a zip lock bag for storage in a cool dry place. (the first day I stored them in my fridge. Now they're in my cabinet.)

And there you are, a yummy sweet treat for all diet types to enjoy that won't set you back. Enjoy!

Gluten/Dairy Free Cupcakes

Oh yes, these beautiful sweet treats are Gluten & Dairy Free!

I was feeling the need for some sweetness so I made
Chocolate Cupcakes with Buttercream frosting and peppermint sprinkles.


Is your mouth watering yet?

Cinnamon Swirl Waffle

I found this one on Pintrest and I couldn't help it! I just had to share it because it's low cost, easy, and fun!

Turning large pre-made cinnamon rolls into waffles with your waffle iron! Neat!


Just put a single cinnamon roll in in each quadrant of the waffle iron and press down slightly to flatten. Cook through and Vwa-la!

Yummy Cinnamon Swirl Waffles for breakfast :)